Integrating BleuIO with Adafruit Feather RP2040 for Seamless BLE Applications (noise sensor) : Part 4
June 14, 2024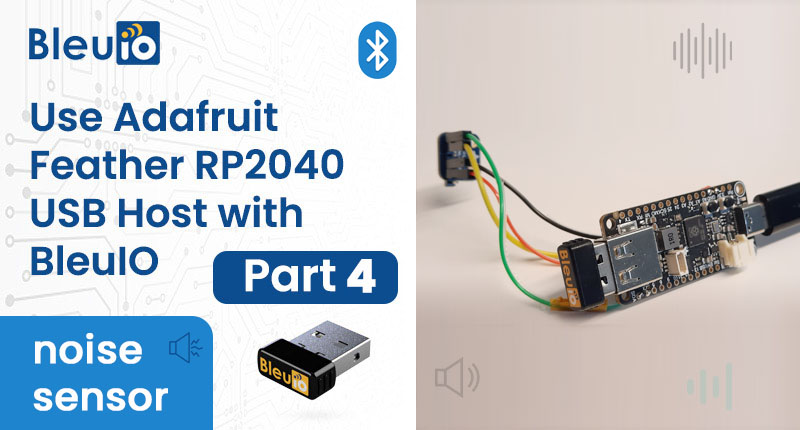
Introduction
This example is going to showcase how to connect a PDM MEMS Microphone to a Adafruit Feather RP2040, together with a BlueIO to create a background noise sensor that measures and advertisises the current sound level in decibel (dB).
This example is very similar to Integrating BleuIO with Adafruit Feather RP2040 for Seamless BLE Applications Part 2 but instead of reading sensor data over SPI every few seconds, we’re using the arduino PDM interface to continuously fill a buffer with data then everytime the buffer is full we’re going to translate the data into the current sound level in dB.
The buffer size of 8000 bytes (2 bytes per sample) and the sample rate of 16kHz means we record 250ms each time we fill the buffer.
Requirements
- Adafruit Feather RP2040 Board
- BleuIO – Bluetooth Low Energy USB Dongle
- Arduino IDE
- PDM MEMS Microphone
- Our example project [Download from GitHub]
Connecting PDM Microphone.
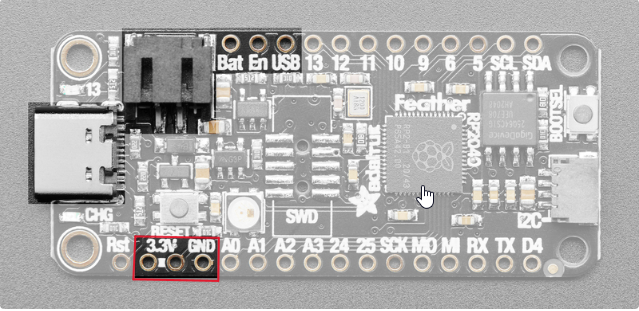
- Connect four wires from the PDM Microphone (3V, GND, DAT, CLK) to the following pins on the Feather Board:
- 3V to 3.3V to power the device, then GND to GND.
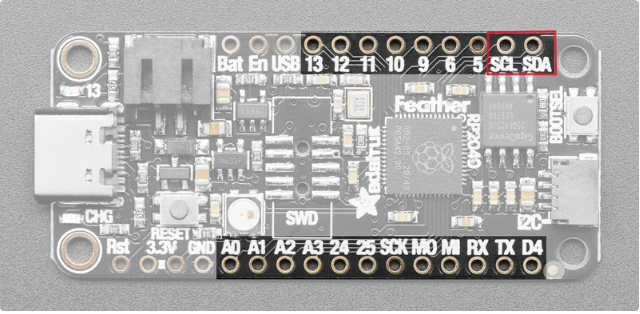
- And CLK to SCL, and DAT to SDA.
Running the example
- Make sure the BleuIO Dongle is connected to the Feather RP2040 Board.
- Connect the Feather RP2040 Board to your computer using the USB cable.
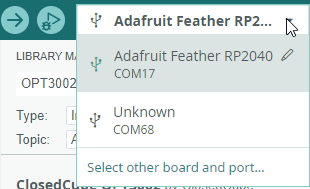
- Make sure the Feather RP2040 Board is selected as well as the correct COM port in the drop-down menu.
- (Optional) Change the frequency the advertising message is updated with the dB value, in the code
// How often we update the advertising message (in seconds) #define READ_UPDATE_FREQUENCY 1 - Click the Upload button.

- Done! The dongle should now be advertising the sensor values. (If you just plugged in the Feather it may take about 10 seconds before advertising starts as the BleuIO bootloader opens and closes)
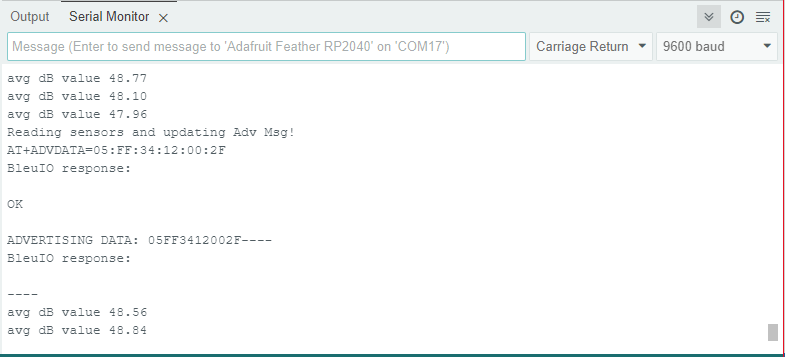
- (Optional) Open Serial Monitor. You can open the Serial Monitor from the menu: Tools>Serial Monitor
You should now see the output from the project.
Scanning the results
To see the results you can use any BLE scanner app.
Here we use nRF Connect:
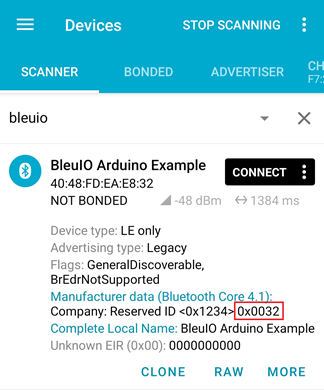
The data in the red box is our sensor values:
0x0032
When we parse the hex into decimal values we get:
0x0032 = 50 dB