Introducing Auto Execution Loop in BleuIO
February 28, 2025
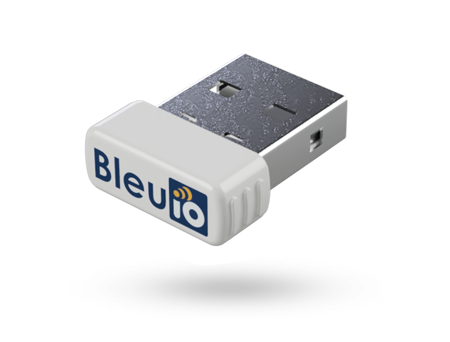
BleuIO, a leading Bluetooth Low Energy (BLE) USB dongle, continues to evolve with its latest firmware updates —version 2.7.8 for BleuIO and version 1.0.3 for BleuIO Pro. This new release builds upon the Auto Execution feature introduced in our previous firmware release by adding a powerful Auto Execution Loop, allowing users to automate repetitive tasks seamlessly. With this enhancement, developers can set up loops in the AUTOEXEC list, enabling continuous execution of commands without manual intervention.
What is Auto Execution Loop?
The Auto Execution feature allows users to store and run AT commands automatically upon startup, making BLE development faster and more efficient. With the new Auto Execution Loop, you can now create loops within the AUTOEXEC list, All auto-execute commands between the loop start and loop end will continue running indefinitely until manually stopped by clearing the auto-execute list using AT+CLRAUTOEXEC.
This feature is particularly useful for scenarios where continuous execution of BLE tasks is required, such as:
- Beacon advertising with dynamic data updates
- Changing BLE characteristics periodically
- Automated device-to-device communication
- Repeating sensor data transmission
How to Use the Auto Execution Loop
Setting up a loop in the AUTOEXEC list is simple and requires only a few steps:
- (Optional) Add any commands that should run once before the loop starts using
AT+AUTOEXEC=*command*. - Define the start of the loop using
AT+AUTOEXECLOOP=START. - Add the commands that should execute repeatedly with
AT+AUTOEXEC=*command*. - Mark the end of the loop using
AT+AUTOEXECLOOP=END. - Restart the BleuIO dongle to see the commands execute automatically on startup. Alternatively, plug it into any power source, like a power bank or USB adapter, and let it run autonomously.
To clear the AUTOEXEC list and stop an ongoing loop, simply use AT+CLRAUTOEXEC. This ensures that any active command sequence is halted.
Real-World Use Cases
1. Dynamic BLE Beacon
Start-up: Disables scan response message and starts advertising.
In loop: Sets the advertising name in advertising data to ‘BleuIO’, waits 10 seconds, sets advertising name to ‘CAT’, waits 10 seconds.
Test: Scan the dongle to see the name change every 10 seconds.
Commands:
AT+AUTOEXEC=AT+ADVRESP=00
AT+AUTOEXEC=AT+ADVSTART
AT+AUTOEXECLOOP=START
AT+AUTOEXEC=AT+ADVDATA=04:09:42:6C:65:75:49:4F  // Name: BleuIO
AT+AUTOEXEC=AT+WAIT=10
AT+AUTOEXEC=AT+ADVDATA=04:09:43:41:54  // Name: CAT
AT+AUTOEXEC=AT+WAIT=10
AT+AUTOEXECLOOP=END
2. BLE Peripheral with Notify Characteristic
Start-up: Creates a custom service with a characteristic with the notify property. Starts advertising.
In loop: Changes the characteristic value to ‘First Value’, waits 10 seconds, changes the value to ‘Second Value’, waits 10 seconds.
Test: Connect to the dongle and subscribe to the notification characteristic to see it toggle between the two values every 10 seconds.
Commands:
AT+AUTOEXEC=AT+CUSTOMSERVICE=0=UUID=72013640-2f23-49bb-8edd-6636969a2545
AT+AUTOEXEC=AT+CUSTOMSERVICE=1=UUID=72013641-2f23-49bb-8edd-6636969a2545
AT+AUTOEXEC=AT+CUSTOMSERVICE=1=PROP=RWN
AT+AUTOEXEC=AT+CUSTOMSERVICE=1=PERM=RW
AT+AUTOEXEC=AT+CUSTOMSERVICE=1=LEN=20
AT+AUTOEXEC=AT+CUSTOMSERVICE=1=VALUE=Value
AT+AUTOEXEC=AT+CUSTOMSERVICESTART
AT+AUTOEXEC=AT+ADVSTART
AT+AUTOEXECLOOP=START
AT+AUTOEXEC=AT+CUSTOMSERVICE=1=VALUE=First Value
AT+AUTOEXEC=AT+WAIT=10
AT+AUTOEXEC=AT+CUSTOMSERVICE=1=VALUE=Second Value
AT+AUTOEXEC=AT+WAIT=10
AT+AUTOEXECLOOP=END
3. Device-to-Device Communication
Start-up: Enables verbose mode.
In loop: Connects to another dongle, waits 10 seconds to ensure connection, sends an SPS message ‘HELLO’, waits 10 seconds before disconnecting, then waits 60 seconds.
Test: Set up a second dongle to advertise and run AT+GETMAC on it to obtain the MAC address. Use that address in the first dongle’s AUTOEXEC list when adding the AT+GAPCONNECT command. Monitor the terminal on the second dongle to see the first dongle connecting and sending ‘HELLO’ every minute.
Commands:
AT+AUTOEXEC=ATV1
AT+AUTOEXECLOOP=START
AT+AUTOEXEC=AT+GAPCONNECT=[0]*MAC_ADDRESS*
AT+AUTOEXEC=AT+WAIT=10
AT+AUTOEXEC=AT+SPSSEND=HELLO
AT+AUTOEXEC=AT+WAIT=10
AT+AUTOEXEC=AT+GAPDISCONNECT
AT+AUTOEXEC=AT+WAIT=60
AT+AUTOEXECLOOP=END
Why Auto Execution Loop Matters
The introduction of Auto Execution Loop in BleuIO v2.7.8 brings a new level of automation and efficiency to BLE development. With this feature, you can:
- Reduce manual intervention by automating repetitive tasks
- Increase reliability by ensuring commands execute consistently
- Enable standalone BLE applications without needing a host device
- Enhance development workflow by quickly testing different BLE behaviors
For developers building BLE applications, this feature opens up exciting possibilities, from autonomous sensor monitoring to seamless device interactions.
BleuIO’s Auto Execution Loop is a game-changer for BLE automation, making it easier than ever to set up continuous execution of commands. Whether you’re developing a smart beacon, a data-logging device, or a BLE-based automation system, this feature allows you to achieve more with less effort.
How to Upgrade:
To take advantage of these enhancements, make sure to update your BleuIO dongle to firmware version 2.7.8. You can find the firmware update and detailed instructions on the official BleuIO website. Click here to know more about firmware updates.

