Real-Time CO2 Status Indicator and Monitor with BleuIO and Renesas EK-RA4M2
August 27, 2024
Introduction
In an age where air quality has become increasingly important, monitoring CO2 levels in various environments is crucial. This project demonstrates how to create a real-time CO2 monitoring system using the Renesas EK-RA4M2 evaluation kit and the BleuIO dongle.
This project walks you through the process of scanning Bluetooth advertising signals from a HibouAir sensor, retrieving CO2 data, and responding to these readings with visual cues through LED indicators on the Renesas board. Blue LED for ‘good’ (<600ppm), green LED for ‘average’ (<1000ppm) and red LED for ‘poor’ (>1000ppm).
The board will also print the CO2 values, as they change, on the RTTViewer.
Requirements
- EK-RA4M2
- BleuIO – Bluetooth Low Energy USB Dongle
- FSP Platform Installer (Includes e² studio IDE, toolchain, and FSP packs)
- J-Link RTT Viewer
- USB OTG Cable (USB-A, USB-B micro)
- HibouAir air quality monitor with CO2.
- Our example project [Download from GitHub]
Setup
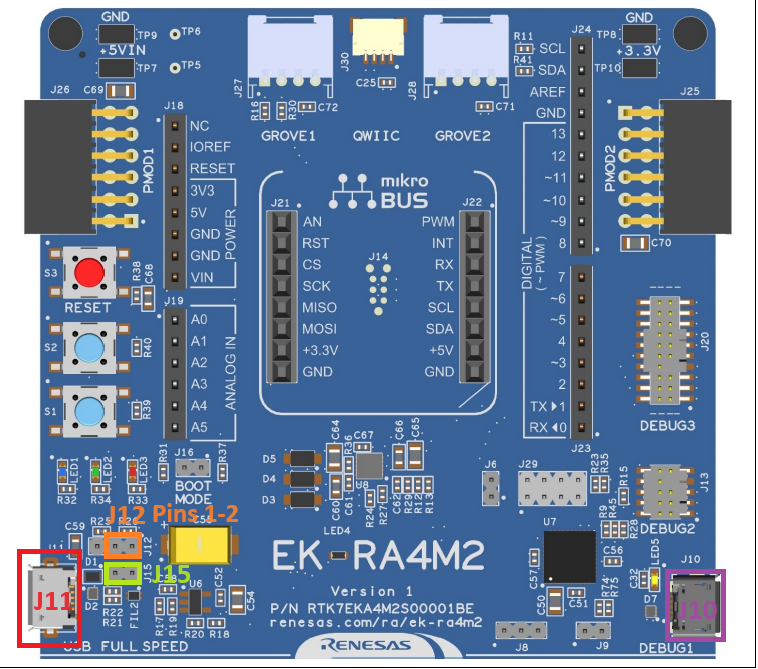
- Connect a Micro USB device cable (type-A male to micro-B male) between J10 (Debug1) and a Computer USB port.
- Plug in a BleuIO Dongle in the USB OTG Cable (type-A female to micro-B male) and connect it to J11 (USB Full Speed).
- Make sure Jumper J12 is placed on pins 1-2
- Remove Jumper J15 pins
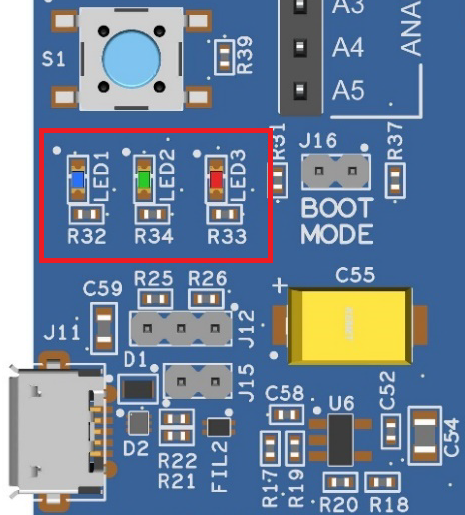
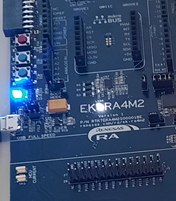
- The example will make us of the on board LEDs R32 (Blue), R34 (Green) and R33 (Red):
Importing project
- Open e² studio IDE
- Choose a workspace and click ‘Launch’
- Download or clone the example project. Place the folder ‘bleuio_ra4m2_co2_monitor_example’ in workspace.
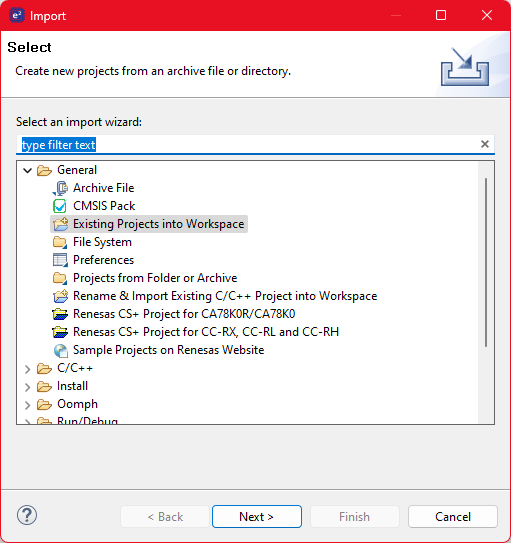
- Choose Import Project
- Select ‘Existing Projects into Workspace’ under the ‘General’ tab:
- Click the ‘Browse…’ button and open folder where the ‘bleuio_ra4m2_co2_monitor_example’ project folder is located:
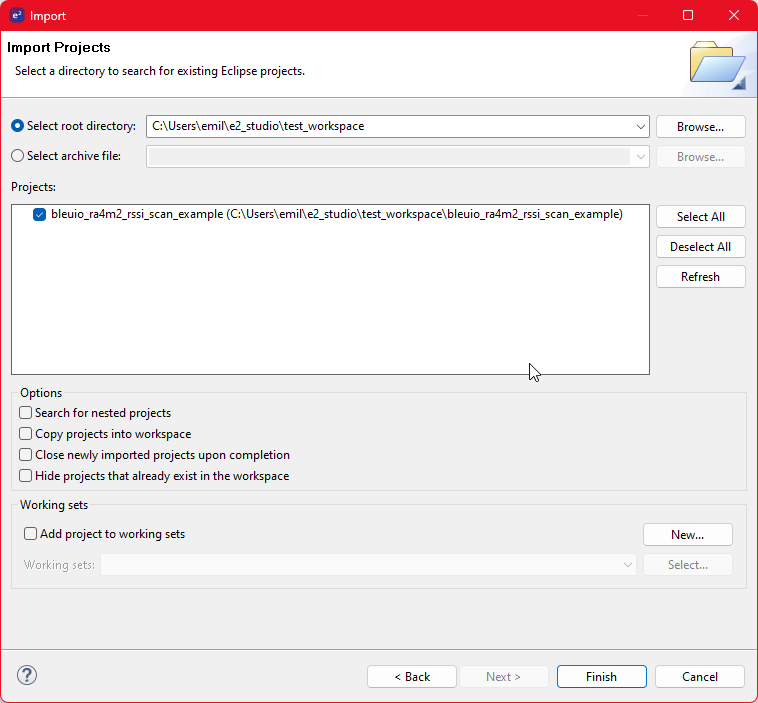
- Finally select the project and click ‘Finish’. You have now imported the the project!
Running the example
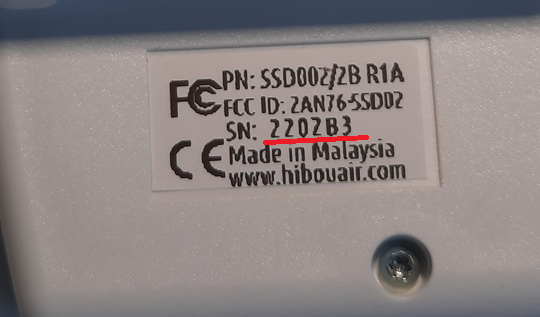
- Go to file ‘usb_hcdc_app.c’ under ‘src/’ and edit line 56 to the board ID of the HibouAir Sensor:
#define BOARD_ID_TO_SCAN "2202B3"
The board ID is printed on the back of the HibouAir sensor:
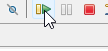
- Build the project by clicking the building icon:

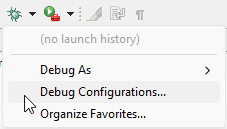
- Use Debug to download and run the project. The first time you need to configure the debug settings. Click down arrow to the right of the Debug icon and select ‘Debug Configurations…’
Under ‘Renesas GDB Hardware Debugging’ select ‘bleuio_ra4m2_co2_monitor_example.elf’ and click ‘Debug’.
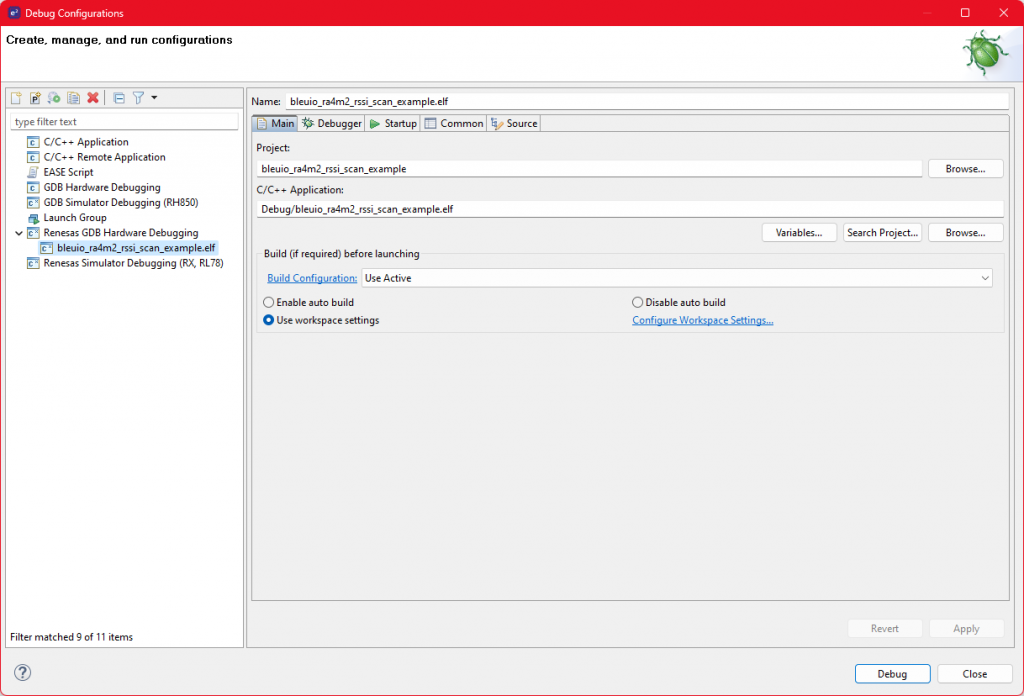
The debug is now configured and the ‘Debug’ icon can be used next time to run the project.
- Open RTTViewer. Connect and use these settings:
Connection to J-Link: USB
Specify Target Device: R7FA4M2AD
Target Interface & Speed: SWD 4000kHz
RTT Control Block: Address 0x2000095c 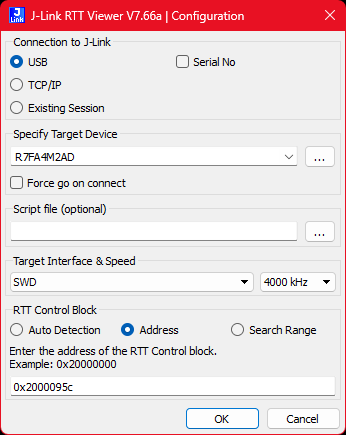
- On the debugger screen in e² studio click the ‘Resume’ icon twice to run the project.
- The application is now running. When starting up you should notice all LEDs lighting up for one second then only the red LED will be on. It will turn off as soon as the BleuIO is configured.
- You should now see the output on the RTTViewer.
Output
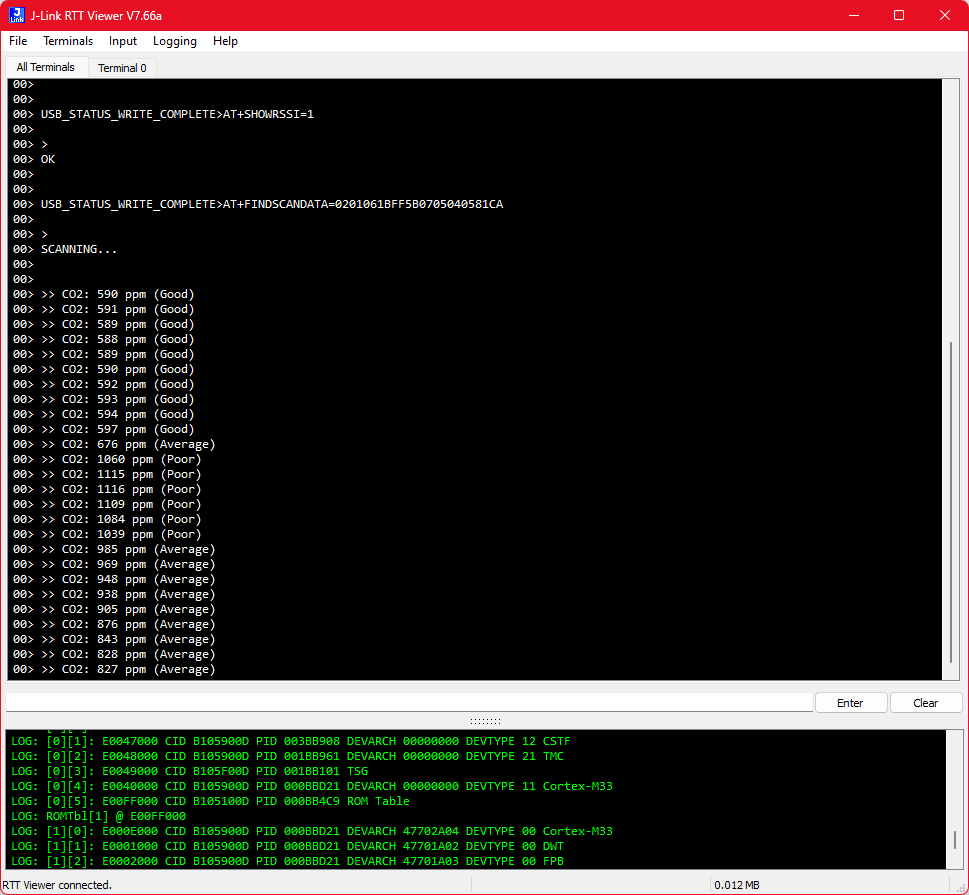
When the CO2 value is less than 600 ppm only the blue LED will be turned on.
If it’s over 600 ppm but below 1000 ppm then the green LED will be on.
If it’s above 1000 ppm then the red LED will be on.
Practical Use Case
The BleuIO RA4M2 CO2 Monitor is an excellent example of how BLE technology can be harnessed to create practical, real-world applications. This project is particularly relevant for environments where air quality monitoring is essential, such as:
- Offices and Workspaces: Monitor indoor air quality to ensure a healthy working environment, which can help in improving employee productivity and well-being.
- Schools and Educational Institutions: Keep track of CO2 levels in classrooms to maintain a healthy atmosphere conducive to learning.
- Public Buildings: Ensure that places with high foot traffic, like libraries or hospitals, maintain safe air quality levels for visitors.
- Smart Homes: Integrate CO2 monitoring into home automation systems, allowing for better air quality control and energy efficiency.
With the BleuIO dongle and this project as a foundation, developers can easily expand on this concept, integrating additional sensors or creating custom applications tailored to specific needs. The combination of Bluetooth Low Energy and the versatile RA4M2 platform opens up a world of possibilities for creating innovative, responsive systems.